I can't tell you how excited I was to help plan a baby shower for Christy. She is one of the sweetest, encouraging, crafty, stylish, fun women I know, and I am privileged to call her my friend. Those of you who know Christy, know exactly what I mean. She's one of those people you are so thankful to have in your life. She and her husband Ben are having their first baby, a little girl, any day now!
Are they a cute couple, or what? These beautiful photos were taken by another beautiful and talented friend of mine (and baby shower planner), Rachel, who is a professional photographer.
Check out more of her amazing work here. I just love this one she took of our glowing-with-child friend.
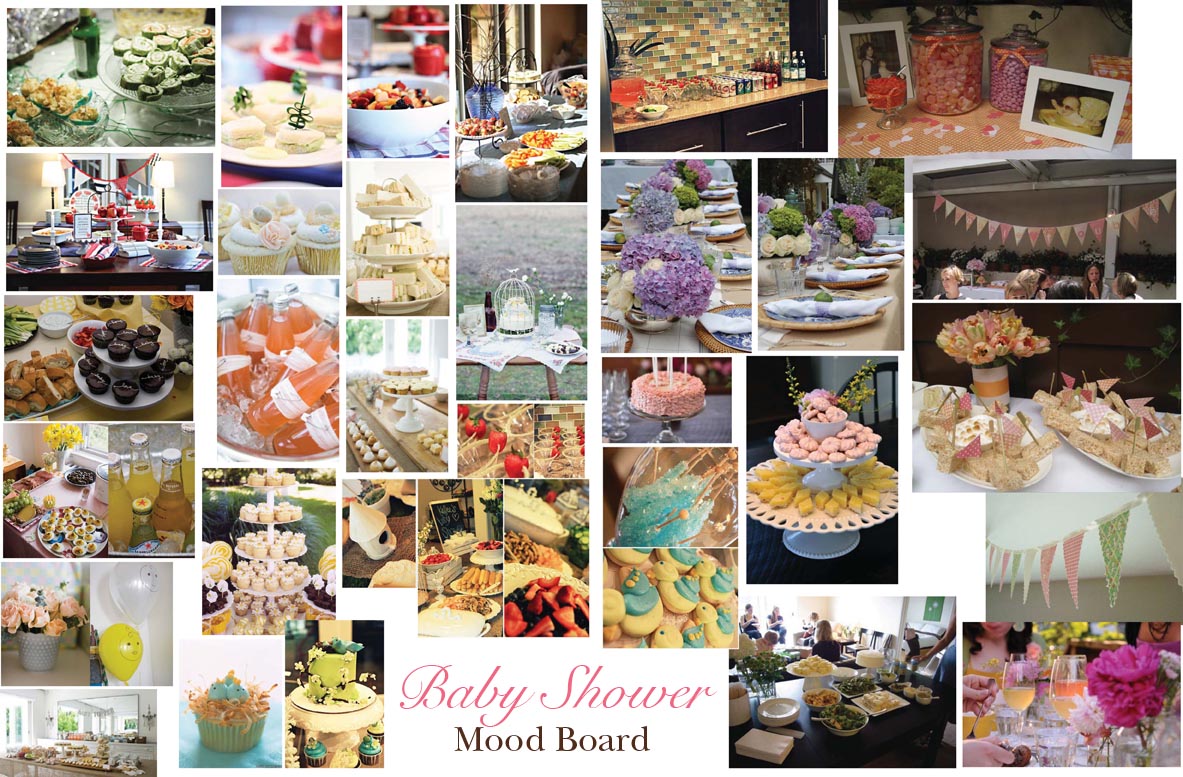
As soon as I could, I set to work gathering baby shower ideas, combing through blogs and looking online for inspiration. I compiled the images I found into a mood board, to organize and express the look and feel I had in mind. I was thinking something along the lines of an afternoon brunch with finger sandwiches, salad, punch, cupcakes and fresh flowers. Elegant and feminine with a vintage feel. I shared these ideas with three fabulous co-planners and everyone was on board!
This is what the mood board looked like (click to zoom).
Rachel, Becca, Morgan and I divvied up the preparation and excitedly waited for the day it would all come together. We could not wait to "shower" our dear friend with blessings! Here's a look at how it all went down.
Photo courtesy of Brette Ashley. Another beautiful and talented photographer friend.
Let's start with the food. Because, what else do pregnant ladies think about besides food? Kidding! That was bad. Christy will laugh though, so it's ok. These ladies put together a fantastic spread. Becca's deviled eggs were
delicious. So were the sandwiches and Rachel's caprese salad.
Then there was Morgan's guacamole and the fruit/pound cake/marshmallow skewers that got even better when dipped in the chocolate fountain!
So good.
The tables were dressed with white linens. I made a two piece runner for each, by cutting a strip of light tan burlap for the base ($2.99/yard). Then I cut and iron-hemmed a smaller strip of pink fabric to lay on top, out of a large pink rectangular table cloth ($6). I love the rough natural texture of the burlap against the soft pink linen. Vintage chic! A couple of candles here and there.
I think I was most excited about putting my milk glass collection to use as centerpieces. I gathered every shape and size vessel from around my house and ended up with a whole bin full. Rachel picked out these gorgeous flowers - pink roses, white carnations, green pom-poms, and what we think are rose hips. Simply beautiful! I just can't get enough of flowers. I love all kinds. Any time of year. They fill a room with life and beauty.
I made a string of paper pennants that hung across the window in the background. You can't see it from here, but each triangle matches one of the favor box designs.
Last year, I found free templates for these cute little paper favor boxes on one of my favorite blogs,
Twig & Thistle, and have been dying to use them ever since. I added four different quotes about little girls, printed, cut them out, assembled and filled them, with Megan's help. Thanks Megan! We put pink basket confetti and chocolate hearts inside each one.
Click here if you'd like to download the templates.
I was also dying to use this cupcake-inside-a-teacup idea. I found a ton of vintage punch glasses at my favorite thrift stores for cheap, which I was very excited about. I designed a little thank you tag to hang on each handle with ribbon. Thank you, Alex, for your ribbon tieing skills! I love how they turned out.
It was finally time for guests to arrive and the party to get started! Our beautiful guest of honor. Friends. Family. Sisters. So many wonderful women in one room.
Amy, our gift stenographer and Becca, recent new Mom and shower planner (who also has an amazing voice).
Christy's sister, Kimi (above, in green), is also expecting her first! In fact, their due dates are very close. Everyone is trying to guess when the new cousins will arrive!
One more mommy-to-be, Rachel, responsible for the beautiful maternity photos, and seen here asking prize questions, is expecting her second! There must be something in the water.
Photo courtesy of Brette Ashley
Morgan was a huge help with the shower. She is such a blessing. Love her! B.A., thank you for snapping this one of her and I! This is Christy's other sister, Susan (below), who, by the way, can bake some serious cookies.
Time for gifts...
Madelyn is going to be one stylish little girl, that's for sure! I don't know how, but baby clothes and baby stuff just keep getting cuter and cuter.
Christy's Mom (soon-to-be Grandma), getting some practice with adorable little Nora, Becca's daughter.
As the shower came to a close, we went outside to capture a few more memories. The planners, momma-to-be, and Maddie (in womb). Maddie, we love you so much and can't wait to meet you! Come out soon, ok? And let your arrival be as simple as a sneeze. Do it for your Mommy.
This one is my favorite. Can you feel the love? These ladies are awesome.
Christy, you and Ben are going to be incredible parents. Madelyn is already so lucky. I am beyond blessed to witness your journey and walk this road of life with you. I love you and I can't wait to see Maddie. I know she will be beautiful, inside and out. Just like her Mom.