Thursday, December 31, 2009

Cinnamon Honey Butter Recipe


I found a recipe for Cinnamon Honey Butter at Fly Through Our Window, a beautiful blog. I like cinnamon, I like honey, and I like butter, so I decided this edible gift project was way too cute not to try, so I did. I think I had more fun decorating the adorable little glass jars and designing my own gift tags than actually mixing up the butter! It made a great Christmas gift. I brought some with us to my in-laws, and we went through 2 jars at breakfast!

Ingredients/Supplies:
2 sticks of butter, room temperature
1 cup of powdered sugar
1 cup of honey
2 teaspoons of ground cinnamon
4oz. canning jars (or larger size of choice)
Square fabric scraps
Raffia, ribbon or string
Tag

I used my hand mixer and whipped the butter. Then I added the powdered sugar, then honey, then cinnamon. Continue whipping, scrapping sides, until blended and creamy smooth. Spoon into jars. What could be easier? And so delicious? I love it on toast.


 DOWNLOAD AND PRINT *FREE* TAGS BELOW


Tuesday, December 29, 2009

Some Christmas Snapshots


"And, behold, thou shalt conceive in thy womb, and bring forth a son, and shalt call his name JESUS." Luke 1:31

Merry Christmas! December 25th was a few days ago, but my husband and I were in Pennsylvania, celebrating with family, so there simply wasn't any time for blogging. I feel so far behind on all the posts floating around in my head. I still want to finish highlights from my trip to Arizona. I have a few handmade crafts and gifts that I can now share, since the recipients have received them, and I won't spoil the surprise. I am currently MOST excited about our latest furniture rearranging in our living room and dining room. I've got the itch to switch up our decor! AND I hesitate to say, I am attempting to sew slip covers for our love seat AND couch. I hesitate, because I have the feeling that very soon I will be very frustrated along the slip-cover-making process, and may want to give up, but I really want to do this! My husband wants a "new" couch too, so he is encouraging me to do it. By New Years. Not gonna happen. But soon. I am determined!

Here are a few snapshots of our Christmas this year, with some of our favorite people in the whole world. I only wish that all of our loved ones could be together during this wonderful time of year. We are truly blessed to have family and friends that we love so much and that love us. Most of all, the love of our Savior. A Savior who loved us so much, that He came to earth. "For the Son of man is come to seek and to save that which was lost." Luke 19:10

I am so blessed to have such caring and hospitable in-laws. They go out of their way to make Christmas memorable and enjoyable for all of us.

My beautiful sister-in-law and her husband, who traveled through the night from Ohio to be with us.

My niece Sydney, adorable, full of energy, and says the funniest things.


My niece Morgan, cute as a button, smiley, and absolutely cuddly.


Our annual family photo in front of the tree.

Ariel view of the tree that we decorated together after Church on Christmas Eve.


Who could resist a felt ornament shaped like a bell, with this adorable face on it? Yes, this is my chubby-cheeked husband, just a little guy way back when. So cute!

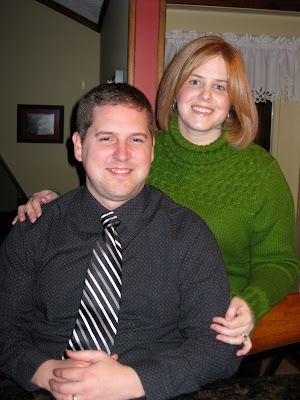
And he's even cuter and handsomer now! I am so blessed to have an amazing husband, every day of the year, and especially on Christmas.

The joy of Christmas morning!

Monday, December 21, 2009

Christmas Music Favorite

This is definitely one of my favorite Christmas CD's. I never get sick of it, year after year. I love the piano, the songs, and the nostalgic feeling that it gives me. "Christmas time is here, families drawing near, oh that we could always see such spirit through the year..."

Sunday, December 20, 2009

Arizona '09 Part 1


Hello all! Are you in countdown mode? Only 5 days until Christmas! That's right, only FIVE days. I am looking forward to celebrating the birth of our Savior with family in Pennsylvania. I was blessed to see my parents who live in Arizona, earlier this month. That was a present in itself! After being back in winter-y NY for a week now, I still haven't shared any of my trip with you. But then again, I have been back to work, shopping, crafting, trying to decorate the house a bit. I'm sure you can understand that!

So, here is part 1 of my trip to AZ, starting with the flight. This may not seem very interesting or even important, but I actually enjoy flying. I used to love it when I was younger. There's just something about being up in the clouds on a sunny morning, removed from the world below, watching earth get smaller and smaller until all you see is a sea of clouds. I have been on many flights and I still always want to capture the clouds (click on the photos to see up close, it's way better!).


At one point it looked like a cloud carpet. A friend once said "Doesn't it look like the softest stuff you've ever seen? It makes you want to wrap yourself up in it and take a nap." All too true. "Thy mercy, O LORD, is in the heavens; and thy faithfulness reacheth unto the clouds." Psalm 36:5

The whole concept of flying still boggles my mind. I know, I know, there's aerodynamics, physics, Newton's laws, and a whole lot of other scientific reasons why planes fly. But it's still amazing. It just is. You know what else is amazing? Being able to watch HGTV at 30,000 feet, especially when you don't have cable at home!


I must say, I was glued to every house-hunting, remodel and decorating show there was. One right after the next. THIS was a great start to my vacation.

You know what else I like about flying? Airplane food. Call me crazy, but nothing gets me more excited in air, than the moment the flight attendants roll the cart down the aisle with mini-size bags of pretzels, soda, water or juice. Better yet, my flight served lunch! Unbeknown to me. Thumbs up for Continental Airlines. I didn't think airlines served meals for free anymore. (Although, I guess it's not really "free" since I bought a ticket and paid to check my luggage. But it still felt free.)


I dined on a cheeseburger (which was quite good), salad and M&M's for dessert. I considered saving my M&M's for later, but decided they must be eaten immediately. Typical.

So I was flying along, watching TV and enjoying snacks, ready for a week of relaxation and warm weather. The longest stretch of my flight was about 5 hours, so I was anxious to arrive, stretch my legs and see my family. As the plane neared Phoenix around sunset, the mountains looked incredible. It is a sight to see, miles of mountains, fading into a sky of pinks and purples. "Before the mountains were brought forth, or ever thou hadst formed the earth and the world, even from everlasting to everlasting, thou art God." Psalm 90:2

When I arrived, we headed to P.F. Chang's China Bistro for dinner. This was my first time at the much acclaimed restaurant, and it did not disappoint. Delicious! Here we are (there's really only one of me, but this is what it would look like if I had a twin). Do you think I look more like my Mom or Dad?


So much to say, so little time! More to come in part 2.

Monday, December 14, 2009

Printable CD Jewel Case 2010 Calendar

Looking to make a personal & practical gift? I designed this set of 2010 calendar cards to fit inside a clear CD jewel case. Each month has it's own color theme and a scripture verse. I know I am not the first to come up with a calendar in this format, but the design and personalization is my own.


What you will need:
  • plain white copy paper
  • color printer
  • scrapbook paper
  • clear CD jewel case (tray and contents removed)
  • scissors/knife
  • corner rounder
  • glue stick
How to assemble:

1. Print all calendar designs on plain white paper with a color printer.
2. Cut out each square with scissors or x-acto knife.
3. Round all corners with a corner punch.
4. Select scrapbook paper that you would like to use for each month (preferably NOT card stock weight, because it will be too thick). They can be all the same, or a different design for each month.
5. Cut out 12 scrapbook paper squares that are approximately 4 3/4 x 4 3/4 inches. Make sure they will fit in your CD case, you may need to trim them slightly.
6. Round all corners of your scrapbook paper with corner punch.
7. Center each calendar month on a scrapbook square of your choice, and glue with a glue stick.
8. Once all 12 cards are glued and dry, match them up in pairs in order of month (January & February, March & April, May & June...you get the idea).
9. Glue pairs of cards back to back so you will have 6 two-sided cards total. (Make sure they are in order and both facing upright)
10. When all cards are dry, assemble inside the CD case, tie with ribbon or raffia, and attach a tag or card.
11. To display the current month, gently take apart the CD case at the hinge, flip the front side and re-hinge, to create a stand up easel. The remaining month cards can be stored in the back or underneath the jewel case. Basically you are putting the sleeve side (front) of the CD case on backwards so that it won't be able to close, and instead stands tall, making a propped open L-shape. The insert tabs will hold your month in place.

Ta-da! A perfect little gift for a friend, family member or co-worker. It will sit on their desk or in their kitchen (or wherever) all year long, and they will think of you every time they turn over a new month!


FREE DOWNLOAD If you would like to download and print the calendar cards I designed, click on each of the 3 PDF links:
Jan/Feb/Mar/Apr
May/Jun/Jul/Aug
Sep/Oct/Nov/Dec

This is the first time I have attempted to link PDF's using Google docs, so let me know if it's not working correctly. If there is a better & easier way to embed PDF's into a blog post, I haven't quite figured that out yet, so I welcome your suggestions.


Enjoy! All I ask is that you use these for personal use only. Please do not sell or take credit for this design. Thank you!

Friday, December 4, 2009

Vacation Here I Come!

Audios Amigos! I am taking a much anticipated vacation from the daily grind, and heading to sunny Arizona for a whole week! So there won't be any posts for a while. But I promise I'll be back. And hopefully I'll be refreshed and full of new creative ideas. Above is a photo of Canyon Lake Vista, that we visited 3 years ago. The landscape is really beautiful. I am ready for some sun, relaxation and spending time with family. Just in time to leave the impending winter snow that is coming our way any day now. I am amazed that it has hardly snowed yet. I'll be sure to post some photos of my trip when I get back. Gotta go pack! xoxo

Sunday, November 29, 2009

Mashed Potato & Chicken Casserole


This photo does not do this dish justice. I forgot to take pictures until there was only a little left over! (and it had been refrigerated over night) Guess it goes to show that it was a hit in our house! This is a great recipe for leftover mashed potatoes. It calls for chicken, but you can use ground beef or whatever meat you like. I used ground turkey this time, and it was just as delicious. It reminds me of Shepherds Pie.

Ingredients:
3 large potatoes (mashed)
1-2 cups shredded cheddar cheese
Can of French fried onions
1 can cream of chicken soup
1/4 cup milk
1/2 tsp. ground mustard
1/4 tsp. garlic powder
1/4 tsp. pepper
3-4 chicken breasts, cooked and cut into bite size pieces (or 1 LB of cooked and drained ground beef/turkey)
10 oz. (or 12 oz) bag frozen mixed vegetables

Directions:
1. Preheat oven for 375 degrees.
2. Make mashed potatoes and stir in 1 cup shredded cheese and French fried onions (most of can, to your liking, and save some for the top).
3. Spread potato mixture into medium greased casserole dish. Spread it up the sides of the dish, leaving an empty space in the middle (I used an 8x8 inch glass pan, and it was piled a little high, but baked down a bit)
4. In separate bowl, mix cream of chicken soup, milk, ground mustard, garlic powder and pepper.
5. Stir in chicken (or meat of choice) and frozen vegetables and coat with mixture.
6. Pour chicken & veggie mixture into center of potatoes and bake at 375 degrees for about 30 minutes.
7. Remove from oven and sprinkle more shredded cheese and French fried onions on top and bake for 3-5 minutes or until cheese is melted.

Enjoy!

Thursday, November 26, 2009

A few of my favorite things...


Happy Thanksgiving everyone! Today, I hope that you were blessed to be surrounded by family & friends (and delicious food). "O give thanks unto the LORD; for he is good; for his mercy endureth for ever." 1 Chronicles 16:34

God has truly blessed me, far above and beyond what I deserve. I have a wonderful husband, who loves me, unconditionally. He fills my life with so much joy and I am so thankful to have him by my side.


I am also blessed with the love of family. I cherish all the times we spend together and the memories I have of each of you in my heart. I'm so glad that God made us family!


I also have two crazy cats that drive me nuts, but fill our home with life and make us laugh. And yes, I love them too. (Don't let them fool you, they look like perfect angels in these photos!)


These are just a few of my favorite and most precious gifts that I am so thankful for today, and every day. I didn't even mention my dear friends that I love so very much. I am counting each of you in my blessings too, you know who you are. I am one lucky (blessed) girl!

Sunday, November 15, 2009

Hobo Bag


After learning how to sew tote bags, I wanted to make a bag with a little more personality and detail. I came across this tutorial for a pleated hobo bag at Ruffles And Stuff and I followed her basic guide to made the bags shown above. I even got a little fancy and added a pocket inside. I like to use a semi-heaver fabric for the outer shell and a corresponding lighter weight fabric for the lining. I really like the thick straps and size of these bags. The ruffled detachable fabric flower is my favorite signature addition. They do take more time to sew than a tote bag and the steps are a bit more involved, but the end result is worth it. I get many compliments when I'm carrying it around. I sold the one on the left and I currently have a custom order. They make nice gifts and are a great purse! If anyone is interested in ordering one, send me an email. You can never have too many purses!

Monday, November 9, 2009

Wegmans Slow-Cooked Beef Minestrone


I made Wegmans recipe for slow-cooked beef minestrone over the weekend, and it was delicious! (Photo from Wegmans.com) The recipe was pretty easy, with all of the prep work done in the first 20-30 minutes. Then it cooked in my slow-cooker for about 6 hours. I added the remaining ingredients during the last 1/2 hour and it was perfectly ready by dinner time. I highly recommend it for a great family meal. I am still enjoying leftovers!

Click here for complete recipe.

Friday, November 6, 2009

Window Valances for My Friend's First Baby

I recently had the privilege of helping my dear friend Kristy decorate her soon-to-arrive baby's room (she's due any day now!). Kristy and her husband have decided to wait for the surprise of finding out if their little one will be a boy or a girl, until he or she arrives. Thus, they wanted the colors to be neutral (the suspense is killing me!). The design was based around her crib set fabric. First we selected colors for the walls, a happy green and a nice warm light yellow border, to go above the existing white wainscoting. Didn't they do an excellent job painting? Nice work.

To pull it all together, I convinced Kristy to let me to sew these adorable window valances (with her help of course). I have been wanting to try my hand at a project like this, so what a perfect opportunity! I wish I took some photos while we were actually making them, but all you'll see is the finished product. We started by removing the elastic and hem from 3 fitted patterned crib sheets. Next, we measured and cut the sheets to the size we wanted. Then we measured and cut strips of brown silky fabric for the trim. I was hesitant to sew such a silky fabric to a cotton fabric, because it was quite challenging to cut, as it kept sliding off the table (great choice Kristy!). But it ended up turning out beautifully and gave the valances such a nice finished look. We used a heavy white fabric for backing the valances to minimize light.

I basically sewed them like a giant pillow case, sewing the bottom and two sides (inside out, then turning it right side out). Then I folded over the top, toward the backside, to make a "tunnel" for the curtain rod. I love how they turned out.


Here are a couple more photos of the room. Don't you love the furniture? Kristy and her Mom recovered the rocking chair and ottoman with brown fabric to match the room. Nice!


The whole room looks beautiful! Kristy,thank you for letting me be part of welcoming your sweet little baby into his or her new home! I hope he or she will love sleeping and waking and playing in this adorable room. Can't wait to meet him or her!

Monday, November 2, 2009

The Writing Is On The Wall: How To Make Your Own Wall Letters


For a while, I have wanted to display some letters on my kitchen wall. I think it gives a room a personalized feel. Especially since I have a love for typography (it's in my graphic designer blood). But you've seen the wooden letters that are out there, some are in "little kid" font a.k.a "Chalkboard", "Good Dog", and even worse, who decided that "Tekton Pro" would look good on anyone's wall? I just wanted a simple serif font in caps. So I decided to make my own letters out of foam core/board and scrapbook paper. You could write "Home" or "Family" or whatever you like.


I started with a piece of white foam board that you can find at most dollar stores, Wal-mart, or craft stores.


Then I typed out the letters I wanted on the computer (I used Adobe Illustrator, in outline type mode to save ink), and fit them to 8.5x11 paper, so I could print one letter per page.


Next, I cut out the paper letters, using an X-acto knife and a metal ruler (wooden rulers tend to get sliced by the knife). Each paper letter became a stencil that I used to trace onto the foam board.


After tracing each paper letter, onto the foam board, I cut out the foam letters, using my X-acto knife and ruler. This is the most difficult part, and where my old sign shop skills come into good use. This part takes me back to the days when we used to cut out foam core letters by the bushel full, then spray paint them or apply vinyl. I miss those sign shop days with my fellow artists, making everything by hand. We had a lot of fun!

Here are a few tips for effective foam core cutting:
1. Make sure you have a good cutting mat underneath your work area.
2. A new sharp blade in your knife is absolutely necessary.
3. Cut straight lines with a ruler.
4. Make sure to apply a good amount of pressure to cut completely through the foam.
5. Try not to "saw" through the foam, it will create jagged edges.


After your foam letters are cut out, select your scrapbook paper, and glue each foam letter onto the back of the scrapbook paper. A regular glue stick works well.

With the glued foam letter face down, cut around the foam letter with your X-acto knife, trimming off the excess scrapbook paper. Ta-da! Now you have a set of letters to display on your wall or on a bookshelf. These letters are light enough that I attached mine to the wall with some sticky-tack.

What do you think? Cute right? Next time I may use more contrasting scrapbook paper, since my wall is red. Home Sweet Home.