I recently designed wedding invitations for my friend Jamie and her fiance Dan. Jamie and I met in high school and we've been friends ever since. She and I were actually biology lab partners - I had to do all the gross dissecting while she took the notes. I don't know why that memory stands out in my mind. Jamie is one of those people with a great big heart, who's always there to listen and talk. She and I usually find something to laugh about, even through life's tough moments. I'm so happy she's found her match. I'm not so happy that they're moving waaaaay down south after they get married.
They have such bright and cheery wedding colors - pomegranate and orange. Their wedding is in May, and I can't wait to see it come together.
They chose with a 2-sided RSVP postcard. Cute and practical (and it saves on postage).
My favorite part is receiving the invitation in the mail, tucked neatly in the colorful envelope, addressed to my husband and I. It's a double joy to be invited to a friend's wedding and get to create the invitation.
See you two love birds on your big day!
Saturday, March 23, 2013
Wednesday, March 20, 2013
Farewell 30
Today, I bid farewell to 30. It's hard to believe this sweet little face was me at 19 months (ironically, I still part my hair that way). Today is also the first day of spring. I'm looking forward to new beginnings and what 31 will bring. Happy Birthday to me!
Sunday, March 17, 2013
RAF Addy Awards
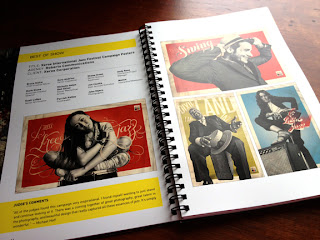
Thursday, I attended the Rochester Advertising Federation 2013 Addy Awards. Picture the Golden Globe's for advertising. A night of the city's talented creatives, under one roof, to celebrate the most outstanding advertising work of the year. A group from our Wegmans Marketing team attended - and actually got a great group photo! We missed those would couldn't be there.
The theme was inspiration. More than 300 pieces were submitted by agencies, photography studios, students and artists. It's not easy to win a coveted Addy, so receiving one is quite an honor.
Upon entering the venue, Nicole and I had our photo taken in front of the inspiration chalkboard wall. I love that chalkboard art is all the rage right now.
Peter, one of the announcers, and his wife Kristie.
Wegmans Menu Magazine was awarded a silver Addy for return on investment. Go Wegmans!
And another silver for non-traditional advertising. There was so much amazing work represented by so many talented artists! I wouldn't have wanted to be a judge.
Photos by Daryl Corbet
I had a great time mingling and celebrating. Half the fun is getting dressed up and having a night out with my peers - outside the office. Everyone looked so fancy!
Photo by Daryl Corbet
Rich (center) of Studio 2B won for his photography and blog 2eat2dink.com (one of my favorites). Congrats Rich!
Daryl (left) allowed me to use some of his fantastic photos.
And I snapped a few with my iphone of course.
A fun and inspiring evening to remember. Congratulations to all the winners and those who submitted their work!
Saturday, March 16, 2013
Reversible Coffee Cozy
My latest favorite sewing project is making these adorable reversible fabric coffee cozy's or sleeves. I'm not an every day coffee drinker, but I do love an occasional java or hot chocolate to get me through the day. Some places give you a cardboard sleeve, others don't give you anything to keep your hand from getting too hot. These cozy's not only keep your hand cool while enjoying a hot beverage, they're stylish too!
I have Kristy to thank for making me this adorable polka dot sleeve and introducing me to these handy gems. They make great gifts! I've been trying to encourage Kristy to start her own blog with all of her crafty projects but she hasn't listened to me...yet.
I had to try making one. I followed this excellent tutorial with free downloadable template.
Materials:
2 strips of fabric (one cut facing left, one cut facing right)
1 strip of InsulBrite (insulated batting) or regular batting
hair tie rubber band
two buttons
thread
I followed the tutorial exactly and was pleasantly surprised how easy they are, once you get the hang of the first one.
I ironed on a "Sohl Design" tag and packaged it up to gift. Can't escape the packaging designer in me!
Front and back
Reverse side front and back
The stitching gets a little thick around the outside, so go carefully with your machine. One major tip is to sew the buttons a little loose so the rubber band can loop around them comfortably.
You'll be sipping in style in no time!
Sunday, March 3, 2013
Corky Mirror
I had been collecting wine corks for years, waiting for the right project to use them for. I also wanted to jazz up the mirror above our console table. One day, I put the two ideas together and decided to cover the wooden framed mirror with corks. A win-win!
I gathered my cork collection to take stock.
And roughly planned out the design on the floor. Even though I had many corks (we like wine, what can I say?), I still needed more. I solicited my family and friends collections as well, and they came through - big time! Turns out, we're not the only ones who enjoy vino (and save the corks). A BIG thank you to those who contributed! You know who you are. I couldn't have completed this project without your generous donations :)
I used craft Wood Glue for the first time, and it dried quickly and held every cork in place.
Truth be told, patience was the biggest requirement for this project. It took quite a while to pick out the right size corks and line them up to fit around the frame. Each cork is unique in size, so it was a puzzle fitting them together.
I like the typography, graphics, quotes and sayings on each one. I ended up using exactly 200 corks! Real ones too, none of the plastic ones.
Aside from one troublesome corner, it turned out as good as I hoped!
It makes for a much more interesting mirror, and I finally got to use wine corks for a project.
There are SO many inspiring cork projects - these were all found via Pinterest. I still have corks leftover and may try another idea.
Anyone else have a collection of wine corks they've been saving? Anyone put them to good use? I like finding ways to repurpose items like this. Put a cork on it!
This is what the inexpensive wooden framed mirror looked like before. I actually have two of these, so I wasn't that worried about making a mistake. There are quite a few wood finishes in our living room, so I wanted add texture to this piece to create some visual interest.
And roughly planned out the design on the floor. Even though I had many corks (we like wine, what can I say?), I still needed more. I solicited my family and friends collections as well, and they came through - big time! Turns out, we're not the only ones who enjoy vino (and save the corks). A BIG thank you to those who contributed! You know who you are. I couldn't have completed this project without your generous donations :)
I used craft Wood Glue for the first time, and it dried quickly and held every cork in place.
Truth be told, patience was the biggest requirement for this project. It took quite a while to pick out the right size corks and line them up to fit around the frame. Each cork is unique in size, so it was a puzzle fitting them together.
I like the typography, graphics, quotes and sayings on each one. I ended up using exactly 200 corks! Real ones too, none of the plastic ones.
Aside from one troublesome corner, it turned out as good as I hoped!
It makes for a much more interesting mirror, and I finally got to use wine corks for a project.
There are SO many inspiring cork projects - these were all found via Pinterest. I still have corks leftover and may try another idea.
Anyone else have a collection of wine corks they've been saving? Anyone put them to good use? I like finding ways to repurpose items like this. Put a cork on it!
Subscribe to:
Comments (Atom)


