Showing posts with label Sewing. Show all posts
Sunday, June 8, 2014
Felt Baby Shoes
I made the cutest little pair baby shoes out of felt and embroidery string. Aren't they darling? They look like mini moccasins. I found a great step-by-step tutorial with a template here. They are hand stitched and are pretty quick to make, once you get the hang of it. The trickiest part was adding a small strip of elastic on the inside, to help keep them on little feet.
I added a ribbon for putting them on and buttons on the back.
You could make any color combination, for a boy or girl.
I made these for sweet little Oliver. I died when Hilary sent me this photo of Oliver wearing them for the first time. Too. Cute. They may be a little big, but he has time to grow into them.
Now Chancho wants a pair. Make that two pairs.
Thursday, July 11, 2013
Paper Treat Pouch
Raise your hand if you're addicted you like Pinterest. Raise your hand if you pin more projects than you actually do. Now, raise your hand if sometimes you actually try a Pinterest project and it turns out to be, in fact, as easy and wonderful as it looked. This cute little paper craft was one of those projects. You can put your hands down now.
I don't know what it is about sewing paper, but it makes me giddy. Like when I sewed Christmas cards and Valentines. I just love combining thread with paper.
I made a bunch of these little triangular pouches as favors, filled with pieces of saltwater taffy, for a ladies luncheon that I hosted. I also went through a saltwater taffy addiction. Cute sewn paper pouches AND candy. It was a lethal combination. My favorite flavors are orange creamsicle, cappuccino, and butter popcorn. Weird, I know.
All you need is:
scrapbook paper (mine were 6.5 by 5 inches)
double sided tape
sewing machine
frilly scissors
and CANDY
Look at that cute little paper edge. Adorable.
I found the idea here with excellent directions.
Cut your paper to size. Make it into a cylinder (like a toilet paper tube) and tape it together. Pinch one end and sew it across. Fill with candy. Pinch the other end in the opposite direction (making it triangular) and sew it closed. Trim the edges with decorative scissors.
That's it! You can make a whole bunch of them for a party, bridal shower, or birthday celebration, in no time. The paper can match your theme. Add stickers. Make large ones to hold more candy, or even wrap a small gift.
And, if you're my age, this shape might also remind you of those triangular popsicle icey treats from the cafeteria in elementary school. Who remembers those?
I don't know what it is about sewing paper, but it makes me giddy. Like when I sewed Christmas cards and Valentines. I just love combining thread with paper.
I made a bunch of these little triangular pouches as favors, filled with pieces of saltwater taffy, for a ladies luncheon that I hosted. I also went through a saltwater taffy addiction. Cute sewn paper pouches AND candy. It was a lethal combination. My favorite flavors are orange creamsicle, cappuccino, and butter popcorn. Weird, I know.
All you need is:
scrapbook paper (mine were 6.5 by 5 inches)
double sided tape
sewing machine
frilly scissors
and CANDY
Look at that cute little paper edge. Adorable.
I found the idea here with excellent directions.
Cut your paper to size. Make it into a cylinder (like a toilet paper tube) and tape it together. Pinch one end and sew it across. Fill with candy. Pinch the other end in the opposite direction (making it triangular) and sew it closed. Trim the edges with decorative scissors.
That's it! You can make a whole bunch of them for a party, bridal shower, or birthday celebration, in no time. The paper can match your theme. Add stickers. Make large ones to hold more candy, or even wrap a small gift.
And, if you're my age, this shape might also remind you of those triangular popsicle icey treats from the cafeteria in elementary school. Who remembers those?
Saturday, March 16, 2013
Reversible Coffee Cozy
My latest favorite sewing project is making these adorable reversible fabric coffee cozy's or sleeves. I'm not an every day coffee drinker, but I do love an occasional java or hot chocolate to get me through the day. Some places give you a cardboard sleeve, others don't give you anything to keep your hand from getting too hot. These cozy's not only keep your hand cool while enjoying a hot beverage, they're stylish too!
I have Kristy to thank for making me this adorable polka dot sleeve and introducing me to these handy gems. They make great gifts! I've been trying to encourage Kristy to start her own blog with all of her crafty projects but she hasn't listened to me...yet.
I had to try making one. I followed this excellent tutorial with free downloadable template.
Materials:
2 strips of fabric (one cut facing left, one cut facing right)
1 strip of InsulBrite (insulated batting) or regular batting
hair tie rubber band
two buttons
thread
I followed the tutorial exactly and was pleasantly surprised how easy they are, once you get the hang of the first one.
I ironed on a "Sohl Design" tag and packaged it up to gift. Can't escape the packaging designer in me!
Front and back
Reverse side front and back
The stitching gets a little thick around the outside, so go carefully with your machine. One major tip is to sew the buttons a little loose so the rubber band can loop around them comfortably.
You'll be sipping in style in no time!
I have Kristy to thank for making me this adorable polka dot sleeve and introducing me to these handy gems. They make great gifts! I've been trying to encourage Kristy to start her own blog with all of her crafty projects but she hasn't listened to me...yet.
I had to try making one. I followed this excellent tutorial with free downloadable template.
Materials:
2 strips of fabric (one cut facing left, one cut facing right)
1 strip of InsulBrite (insulated batting) or regular batting
hair tie rubber band
two buttons
thread
I followed the tutorial exactly and was pleasantly surprised how easy they are, once you get the hang of the first one.
I ironed on a "Sohl Design" tag and packaged it up to gift. Can't escape the packaging designer in me!
Front and back
Reverse side front and back
The stitching gets a little thick around the outside, so go carefully with your machine. One major tip is to sew the buttons a little loose so the rubber band can loop around them comfortably.
You'll be sipping in style in no time!
Thursday, November 15, 2012
DIY Infinity Scarf
I whipped up an infinity scarf, or as I also like to call it, a uni-scarf. Have you done this? Or thought about doing this? It has to be one of the easiest sewing projects ever. I was literally done in about 5 minutes. Maybe 7.
I happened upon this oatmeal knit scarf from H amd M, at the thrift store for $3. This would be the perfect opportunity to try sewing the ends together.
I didn't care for (or need) the fringe on the ends, so I carefully cut it off.
Then I pinned both ends together.
And sewed all the way down both ends, with my sewing machine, using a zigzag stitch.
Voila! A regular old scarf turned infinity scarf in mere minutes.
Side note: I wouldn't wear it with this particular outfit, it's just what I happened to have on while I was making it.
Side note #2: Yes, my hair is actually as long as the scarf. Yowza.
Here's some more infinity scarf inspiration. You could make one out of any type of scarf, or fabric for that matter. Have a scarf in your closet you're tired of? Refresh it by sewing the ends together for a new look! You won't have to worry about tying, looping or configuring it - just loop it around and go.
I happened upon this oatmeal knit scarf from H amd M, at the thrift store for $3. This would be the perfect opportunity to try sewing the ends together.
I didn't care for (or need) the fringe on the ends, so I carefully cut it off.
Then I pinned both ends together.
And sewed all the way down both ends, with my sewing machine, using a zigzag stitch.
Voila! A regular old scarf turned infinity scarf in mere minutes.
Side note: I wouldn't wear it with this particular outfit, it's just what I happened to have on while I was making it.
Side note #2: Yes, my hair is actually as long as the scarf. Yowza.
Here's some more infinity scarf inspiration. You could make one out of any type of scarf, or fabric for that matter. Have a scarf in your closet you're tired of? Refresh it by sewing the ends together for a new look! You won't have to worry about tying, looping or configuring it - just loop it around and go.
Saturday, August 18, 2012
Dolman T-Shirt Refashion
This one's for you Kimi. It's time for another one of my clothing refashion adventures. Pinterest strikes again! I saw a tutorial for turning an XL men's t-shirt into a dolman shirt that I could wear. I didn't even know what a "dolman" was, so I looked it up on wikipedia (the source of all "reliable" answers of course).
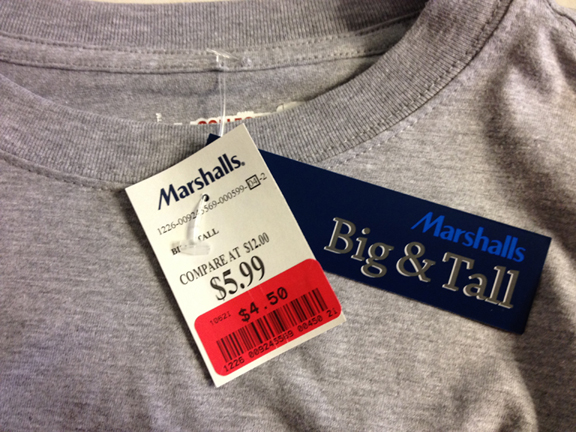
I got an XL plain gray t-shirt from Marshalls for $4.50. I figured it couldn't hurt to give it a try.
As you can see, it was far too large and not fitted at all. This was my project at our June craft night.
I followed Trash To Couture's tutorial, as seen here. She has great step-by-step instructions, photos and a video to follow. It didn't take me very long at all. Next time, I would allow a little more fabric for the width of my sleeves - I sewed them a little too tight! And it took me two tries to sew up the body of the shirt because I hate measuring. I tend to wing it. Then I have to re-do it. No patience I tell ya.
I was pretty pleased with how it turned out. Even if I wear it around the house, it's a comfy shirt. Leah was my stylist for this photo. I think she should take all my fashion photos from now on. Notice the beautiful white storage bench I'm leaning against - this was an amazing furniture transformation by Christy. You have to see the before photo. Read about Christy's dresser makeover here. And then leave lots of comments so she'll start blogging again!
I also made the leftover fabric from the t-shirt neck into the lovely visor that Leah is modeling. That girl can make anything look good! I may be on to something.
As you can see, it was far too large and not fitted at all. This was my project at our June craft night.
I followed Trash To Couture's tutorial, as seen here. She has great step-by-step instructions, photos and a video to follow. It didn't take me very long at all. Next time, I would allow a little more fabric for the width of my sleeves - I sewed them a little too tight! And it took me two tries to sew up the body of the shirt because I hate measuring. I tend to wing it. Then I have to re-do it. No patience I tell ya.
I was pretty pleased with how it turned out. Even if I wear it around the house, it's a comfy shirt. Leah was my stylist for this photo. I think she should take all my fashion photos from now on. Notice the beautiful white storage bench I'm leaning against - this was an amazing furniture transformation by Christy. You have to see the before photo. Read about Christy's dresser makeover here. And then leave lots of comments so she'll start blogging again!
I also made the leftover fabric from the t-shirt neck into the lovely visor that Leah is modeling. That girl can make anything look good! I may be on to something.
Thursday, August 9, 2012
Elastic Empire Waist Skirt
I've been wanting to make an elastic empire waist skirt ever since I saw few examples on Pinterest.
I was inspired by this dress made by Meg at Tripping Over Joy
Meg referenced this dress tutorial at Smashed Peas and Carrots
I've had this $7 dress sitting in my closet for a year or longer but I didn't like the top. It was too drape-y and wrapped at weird angles. I never wore it, but I liked the fabric and the teal color. I decided to cut the top of and make it into a skirt.
I bought thick black elastic, measured the length I wanted and sewed a seam connecting both ends.
Next, I gathered and pinned the skirt fabric to the elastic waist band, trying to make even pleats, all the way around.Then I sewed the fabric to the waist band (going around twice). It was fairly easy to do. The one thing I should have done was use elastic thread instead of regular thread, to allow it to stretch with the elastic. Next time.
I decided not to attach a tank or shirt to the skirt, which makes it more versatile. I can wear it with a tank top or T-shirt. I can also add a fabric flower or dress it up with jewelry. Now I have a cute summer skirt that I re-purposed from a dress!
I was inspired by this dress made by Meg at Tripping Over Joy
Meg referenced this dress tutorial at Smashed Peas and Carrots
I've had this $7 dress sitting in my closet for a year or longer but I didn't like the top. It was too drape-y and wrapped at weird angles. I never wore it, but I liked the fabric and the teal color. I decided to cut the top of and make it into a skirt.
I bought thick black elastic, measured the length I wanted and sewed a seam connecting both ends.
I cut off the top of the dress and laid out the skirt fabric on the table.
Next, I gathered and pinned the skirt fabric to the elastic waist band, trying to make even pleats, all the way around.Then I sewed the fabric to the waist band (going around twice). It was fairly easy to do. The one thing I should have done was use elastic thread instead of regular thread, to allow it to stretch with the elastic. Next time.
I decided not to attach a tank or shirt to the skirt, which makes it more versatile. I can wear it with a tank top or T-shirt. I can also add a fabric flower or dress it up with jewelry. Now I have a cute summer skirt that I re-purposed from a dress!
Sunday, July 1, 2012
Flutter Flower Shirt
I finally finished my flutter flower shirt, and I'm really happy with it. This was the first project I ever pinned on Pinterest, almost two years ago! I was quite inspired at the time, and got the materials right away, ready to go to work. And then, as some of my projects do, it sat in the closet for about a year. Until I brought it to craft night around Christmas time, and decided to give it a go. I cut out all the flowers (about 26 of them!) but didn't feel like sewing them on by the time I was done. Then I brought it to craft night again in the new year and worked on it some more. Then I didn't like where I placed the flowers. I almost gave up on it. But my motivation to have a new article of clothing was strong, so I finally finished it at our most recent craft night, adding the last few flowers. Hooray!
This was my inspiration. A full step by step tutorial can be found here. Isn't it cute?
All you need are two of the same shirt. One in your size (medium, in my case) and one much larger for cutting out flowers (XXL). The best part is these actually didn't cost me a penny, because they were on sale for $5 each at Old Navy and I had two $5 reward coupons. Score!
I followed the tutorial and cut 1.5 inch strips out of the XXL shirt.
Then cut and assembled the flower petal shapes with matching thread.
And two years later (ha ha), I have a new embellished shirt! I do like how it turned out in the end. Ruffles and embellished clothing are everywhere you look. It's not that difficult to make one yourself - you can actually accomplish this in one sitting, I promise. If you don't start and stop and start and stop like me.
Glad I didn't give up on this one!
Yes, I took this photo of myself while riding (not driving) in the car.
And yes, I always wear my seat belt.
This was my inspiration. A full step by step tutorial can be found here. Isn't it cute?
All you need are two of the same shirt. One in your size (medium, in my case) and one much larger for cutting out flowers (XXL). The best part is these actually didn't cost me a penny, because they were on sale for $5 each at Old Navy and I had two $5 reward coupons. Score!
I followed the tutorial and cut 1.5 inch strips out of the XXL shirt.
Then cut and assembled the flower petal shapes with matching thread.
And two years later (ha ha), I have a new embellished shirt! I do like how it turned out in the end. Ruffles and embellished clothing are everywhere you look. It's not that difficult to make one yourself - you can actually accomplish this in one sitting, I promise. If you don't start and stop and start and stop like me.
Glad I didn't give up on this one!
Yes, I took this photo of myself while riding (not driving) in the car.
And yes, I always wear my seat belt.
Subscribe to:
Posts (Atom)


.jpg)