Showing posts with label Furniture. Show all posts

Monday, August 17, 2015

Mini Coffee Station


If there's one thing that will always be a staple in our kitchen, it's a coffee maker. My husband is an avid coffee drinker and he has been since the day we met. Morning, noon or night, he's almost always up for a cup (or two or three). 


I've seen many different types of coffee stations or coffee bars all over Pinterest. I was especially inspired by Katie Bower's desk turned coffee bar. Our kitchen isn't big enough to dedicate much counter space to making a true "station", or add a large piece of furniture, so I kept thinking of other ways to create something on a smaller scale.  


I've had this wooden wine rack in our living room for a few years. It feels like a tall end table. It's been serving as a wine-magazine-candle rack for quite a while. I wondered if it might just work as a mini coffee station. 


It's one of the first things you see when you walk into our house and is snugged right behind our kitchen table next to a bench. Anything bigger would be too much. 


I really wanted to incorporate shelving above to keep mugs and a sugar bowl. The shelves were already there, so all I had to do was re-style them. All you need is some type of stand - it could be an old dresser, hutch, desk, island, table, shelving unit, anything! Add your coffee maker and a basket or tray with supplies - coffee (of course!), filters, stir sticks, whatever you like. And lastly, some pretty mugs, sugar, and other fixin's. That's it! Cute, right?


Make sure you have something underneath your coffee maker if it's a wooden surface or something you'd rather not get wet. I used a round place mat. Andrew's favorite coffee is Wawa hazelnut. He buys some every time we go to Pennsylvania to keep his supply stocked.


I can also store my cookbooks and still use it for wine bottles. A perfect little multipurpose stand! I bought this inexpensive wine rack at Big Lots years ago. Check out the miscellaneous furniture section at similar stores for little gems like this. 

Cheers and happy coffee drinking!

Friday, August 14, 2015

White to Bright Style Challenge


Chairish, an online marketplace for buying and selling vintage furniture, invited me to participate in their White to Bright style challenge. The goal is to design a mix styles room, with a color scheme based around an accent chair. If you know me, you know that I like vintage furniture and I love styling rooms and picking out home decor. My kind of fun!


I selected to use their Bergere chairs with orange upholstery. Aren't they pretty? Great lines! As soon as I saw them, I knew they were the ones I wanted to design a room around. Since I have a tangerine wing back chair in my living room, that also happens to be a vintage find, I was all the more inspired. I'm not afraid of color and mixing old and new styles.  

I learned two cool things while designing this room. First, I discovered what Chairish is. It's such a great site for buying, selling and browsing. I could look around all day! So many unique pieces. And not just furniture, but lighting, art, rugs, small decor and more. What a wonderful way to be inspired - and keep your eye out for diamonds in the rough at garage sales and flea markets. Shop for Chairish accent chairs here.

Secondly, I discovered Polyvore. Am I the last one to know about this? It's got style boards, fashion, home decor, and trends galore. Seriously. Why didn't I know about this? You can make your own boards and pick and choose from hundreds and hundreds of images. It's a collage makers dream come true! If you're looking for a specific item, such as a blue ottoman, you can run a search and find every blue ottoman that's out there. Uh. Maze. Zing. When I was a little girl, I literally used to cut pictures of furniture out of magazines and glue them to paper to decorate pretend rooms. I was so ahead of my time!


Here is the room I created, based on the pair of orange Bergere chairs. I designed it in Photoshop (because I use it all the time and found it to be more flexible for me), but if you don't have Photoshop, Polyvore is your new BFF. 

What goes with orange? I chose navy blue and gray with gold accents. I'm still a fan of light gray walls. It's a wonderful neutral that almost any color can work with. The dark gray floor length curtains create a nice backdrop for the room. The orange chairs really hold their own, so I chose complimentary pieces that helped them stand out, yet look like they all belong together. I like how the gold lamp, mirror and chandelier add shine and sophistication, but aren't too fancy or ornate. The navy blue love seat pulls everything together and helps anchor the room. The blue and white ottoman plays off the love seat and adds another layer of texture and pattern. The rug also introduces a subtle pattern, with a warm straw color that works with everything and looks great against the wood flooring. 

I don't know about you, but I would like to live in this space! It feels modern with a vintage flair, yet looks comfortable and approachable. I'd say this room is definitely not boring white, but cheerful and bright! 

Thank you, Chairish for the opportunity to create a fun room! I hope you'll be as inspired as I was.


Wednesday, August 20, 2014

Nightstand Makeover


Hello friends! I am a bit behind on sharing a few recent projects that have to do with our bedroom makeover. One of which, I was pretty excited about. This pair of mismatched nightstands. I found the white one on the side of the road (trash night), therefore it was *FREE*. It was in rough condition but the shape was so pretty. It just needed some love! I found the wood one, of similar size and style, at the flea market last summer for three dollars. $3! 


They both sat, untouched for over a year until I decided I would make them pretty and use them in our bedroom. They definitely needed some sanding, new paint and a pop of color.

At first, I tried bold blue, but it just wasn't right. I kept seeing beautiful coral night stands on Pinterest and that's was I wanted to incorporate into our bedroom color palette.

I landed on "Coral Bell" as the winning color. I really like it! Painting them the same color definitely makes them look "less different" and more harmonious. Such a stunning transformation. I'm not afraid of color, as you know from my yellow china cabinet.

Stay tuned for more projects from my bedroom makeover and the big reveal. It's about 95% done.

Wednesday, March 12, 2014

Tangerine Chair


Meet my "new" vintage tangerine chair. There's a bold addition to my living room and I love it! I don't know why, but this chair makes me so happy. 


It completes the corner of the room and feels like it was made for it. 


Originally, I had a pair of tan arm chairs in here, but one has since taken residence in my home office, leaving room for a replacement. I've been on the lookout for a Queen Anne chair with some character, for a loooong time. But, I wouldn't settle until I found the right one. Plus (as always), the price had to be right.


A couple Saturday's ago, I was perusing Craigslist, and came across this chair listing at a newly discovered second hand shop. As you can see, the photo isn't the greatest. I couldn't tell what shape it was in or the exact color. That afternoon, I had to see it in person. I walked through the shop a few times, trying to decide. It was only $30! Could I pass it up? Would I really like it in my house? Was it too risky? It was in very good condition. The chair kept calling to me. I had to take it home. Call me crazy. And impulsive. 


I considered putting it in my office, but once I got it home, it matched too perfectly with the living room to put it anywhere else. You should have seen me, I was so excited! 


The touches of orange accents already in the room tie it all together. 


The fabric is a soft velour in really good condition. It's comfortable too! This piece was a gem on many levels. I was giddy. It reminds me of my parents velour chairs. It also reminds me of the orange carpet, orange couch and orange checkered wallpaper in the kitchen of the house I grew up in. That might explain what I'm not afraid of orange. 


Don't you just want to sip a cup of tea and read a book here? 

If you're looking for new-to-you furniture, I am a fan of checking Craigslist before dropping a large amount of money on something brand new. Check often and don't get discouraged. Sometimes you might find exactly what you're looking for. I usually email first and ask a few questions, such as: Is it from a smoke-free, pet-free home? Is there any major damage to it or repair needed? Does it need to be cleaned?

This time I really lucked out because I discovered a second hand shop that I didn't know existed. The shop people told me that they know who the chair came from and they will be very happy to know it's going to a good home. That makes me feel ever better about my purchase. Welcome to your new home.  

Sunday, February 23, 2014

China Cabinet Makeover


I'm excited to share my first ever china cabinet makeover! I figured we could use some sunny yellow right about now, in the midst of dreary winter. 


I found this china cabinet at a local thrift store and could. not. pass. it. up. I think I ended up paying $41 for it. What a bargain! It was calling out to me for some TLC. It also whispered, "If you take me home, I'll display your milk glass collection." Sold. 


I scoured Pinterest for china cabinet inspiration and pinned a few that caught my eye. I was really torn between playing it safe with white, or going for a bold statement color. In the end, my heart was stuck on yellow. I decided to go for it! 


After a light sanding, we used three coats of Martha Stewart's color "Egg Yolk" with Glidden's Duo Paint and Primer in one, Eggshell. I have my husband to thank for finishing it up for me with his expert painting skills. 


The transformation took place in our garage over a few days. 


I am thrilled with the result! Yellow is the perfect pop of color in our living room. It looks great against the gray walls and my milk glass collection looks so pretty in it! 


I finally have a place to store my treasured pieces.


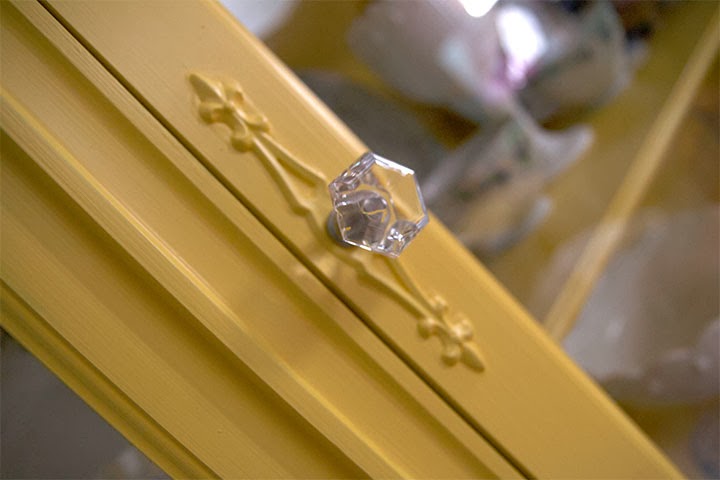
The finishing touch was swapping out the old brass hardware for some elegant glass knobs. I just love it! 


Recently, I came across this photo in a magazine. I can't remember which magazine now - Real Simple maybe? It confirmed my choice to paint a piece of furniture yellow. "It's like an exclamation point on the room." I agree. So cherry!


What a transformation. Don't be afraid to scoop up those diamonds in the rough you see at  second hand stores or garage sales. If it's in decent condition and has good bones, you can give it a new life and make it something really beautiful - for not a lot of money. That's the beauty of DIY projects and thrifty finds! 


Monday, November 11, 2013

Side Table Facelift


Confession #1: I really don't like painting furniture. In fact, I hate painting furniture. But I still always want to, because the results are so amazing. It's usually worth the effort in the end.

Confession #2: I admit to curb-side shopping (also known as garbage picking). I prefer to think of it as thrifty repurposing. This darling little side table was one such find from a certain neighbor's trash night. I saved it! There was nothing wrong with it, just some dust and light wear and tear. Perfectly good junk treasure, I say! 

It sat in my kitchen for a couple years, holding a basket of snacks and cookbooks. Plain 'ol boring brown wood. I often thought about painting it.

Then, when I started assembling and styling my home office, I needed a little side table next to my reading chair. Something small that wouldn't take up much space, but big enough to hold a coffee mug, yet be decorative. I wish you could have seen the light bulb that went on in my head. 

This curbside salvage was a perfect fit! And it was time to dress it up with some quick color. 

Did you know that Home Depot sells 8oz paint samples for $2.94? Did you know that a little jar like this can paint a couple of small projects? It does. I painted one coat on this table and one coat on a large wooden frame and only used about half of it. Yeah! I used flat paint in the color "venus teal". A nice dusty aqua/teal/gray. It covered really well too. 

Next time you have a small painting project, you could buy one of these samples in your choice of color, instead of buying a whole quart or gallon. This secret almost makes me want to paint another piece of furniture sitting in my basement...

Sunday, June 9, 2013

DIY Ottoman

We recently built our own ottoman, from scratch. This is a project I've been wanting to try for a while. It seemed pretty basic. I found great examples and inspiration on Pinterest. I considered re-purposing a coffee table or a bench, but custom making one seemed like the way to go, then I could decide the size and height - and I like a challenge! I also wanted to try tufting for the first time.

Supplies
Wood base (we used leftover 3/4 inch plywood)
Foam
Batting
Fabric
Button covers (if adding tufting)
Spray adhesive 
Staple gun with staples
Wooden legs
Leg plates
Spray paint (if legs need to be painted)
Upholstery needle
Nylon thread

This was kind of a learn-as-you-go project. After finding a piece of foam, Andrew cut the wood base to match the size. I lucked out by finding an inexpensive piece of foam at Ollie's Bargain Outlet. Foam can really be expensive, so shop around. You may even want to order it online. 

Secure the foam to the board with spray adhesive to keep it from moving while you upholster it. 

Wrap a snug layer of batting around the foam, and staple it to the wood base underneath. We worked on top of a small table.

Smooth out your fabric in place, making sure there is enough to go around all sides. If you're using fabric with a pattern, make sure the design is centered. Trim off the excess fabric and staple the fabric snugly to the board. Start at the middle and work your way out. Keep the fabric taut at all times, but not pulling tighter on any one side. If something is loose, you can always remove the staples and start again.

Meanwhile, paint the legs, if you need to. I picked these up at Home Depot, unfinished, for about $3 each and spray painted them white.

Folding and wrapping the corners was the most difficult part. I watched a couple how-to-upholster videos on YouTube that helped me figure this out. The key is not to have too much fabric in the corner. I kept trimming some of it away, in order to achieve a nice flat folded edge. Keep practicing it until you get it how you want it, and staple it in place. 

Time to get the drill. Once your fabric is all stapled down, place the leg plates in each corner and drill them into the base. Attach the legs, making sure they are standing even and upright. If they are crooked, you may need to adjust. 

Make your fabric covered buttons if you're going to add tufting. I initially only wanted one button in the center, then I decided it needed a total of 5 to look finished and balanced. I won't begin to try and explain this part. I used an excellent button tufted headboard tutorial. It's not as difficult as you might think. The key is drilling holes through the wood base and the foam, having a long upholstery needle, and pulling the buttons tight in order to tie them underneath. 

Here is the finished product! 

Not bad for our first try! I'm really happy with how it turned out. Now we have a soft place to rest our feet when we're sitting on the couch. 

And invariably, this happens. Of course, they think it's for them. 

Here are a couple ottoman projects that helped and inspired me. 


This guy thinks he can hide from me. He likes to photobomb.

I really like our cheery homemade ottoman. And if I ever want to change the fabric, I know I can switch it. This was a fun project for us to do together. Have you ever built an ottoman or piece of furniture? If so, were you happy with the results? What would you do differently next time?