Showing posts with label remodel. Show all posts

Thursday, March 17, 2016

Smooth Ceiling Renovation, Part 3: After


It's finally time to reveal our beautiful new ceilings! (drum roll...) Tada! Crisp, white, non-stained, un-bumpy, smooth ceilings all around. I still look up and marvel at how nice it is. I can't express how much better and brighter and newer everything looks now! It feels like it was always this way (and should have been). 

Here's a comparison of the before and after.


Isn't it great? We are very happy with how it turned out and can't thank our friend, Jesse Wilson, of J. Wilson Construction enough for the time he spent working on it and helping us get through this massive project! 


We replaced the old iron wall sconces that had shades, with new simple brushed silver lights - which we discovered were on a dimmer switch. Bonus!


Here is another before and after comparison of the front play room. The light fixture was switched to match the one in the hall (similar style as before).


The living room and kitchen have LED recessed lighting, which are all on dimmers. The amount of light and the quality is amazing now. We can actually SEE what we're doing in the kitchen. Like chopping vegetables and not feeling like I'm in the dark. It makes SUCH a difference! I wasn't sure if we needed as many lights as we were planning on, but it was totally worth it! I don't regret any of them.


And last, but certainly not least, a new light fixture for our eat-in kitchen. I selected this pretty glass beauty at Home Depot and it's just right for this spot. Doesn't it look like a trifle bowl or an upside down cake stand? Perfectly fitting. The old chandelier was so bulky for such a small space and trying to keep 6 light bulbs always lit was annoying. I love the simplicity of the new light. 


This gives you a sneak peek at my mini kitchen makeover (no more red). More to come on that, soon!

I now have such an appreciation for ceilings and the work it takes to make them look good. Andrew and I survived another major home project and Marshall made it through his first one! It took two solid weeks of work, and then additional days of finishing up loose ends. Definitely memorable, and in the end, worth all the mess and inconvenience. I'm so thankful for my "new home", because cosmetically, it feels like we got a new first floor.


Friday, March 4, 2016

Smooth Ceiling Renovation Part 1: Before


Last winter, we had significant damage to the ceilings in our main living area, from ice damming and leaks (even though our roof is very new). In fact, the week that Marshall was born and we brought him home from the hospital is when the ceilings started leaking. Perfect timing, right?

Eventually the snow melted and the leaks dried, but we were left with ugly discolored spots scattered throughout the first floor, areas that were cracked and bowing and it just looked really terrible. It had to be fixed. No way around it. Fixing it meant that all of the ceilings (except for the bathroom and office) needed to be replaced. Which involved a full ceiling tear off, spanning multiple rooms. Um. Yeah. The sky ceiling was literally going to be falling.

My head was spinning and my blood pressure rose just thinking about the idea of tearing down the ceilings and the utter mess and upheaval that would come along with it! Not to mention the fact that Marshall and I are home every day. Where would we go? What would we do? How long would this take? Could we still live here through a renovation of this magnitude? How much would it cost? Who would do the work? Can't we just move instead? All valid questions. 


Thankfully, our insurance would cover a large portion of the cost. We contacted our friend and contractor, Jesse, of J. Wilson Construction, and he assessed the project and we worked out the timing and details. Jesse helped us when we gutted and remodeled our first floor bathroom, which was another large project. Andrew would be able to help with the ceiling demolition, painting and cleanup. 

Here are images of the main living room, play room and hallway before. Notice the large skylight that was odd-shaped. The stucco-style texture was everywhere.


As you can see, we had old textured (and uneven) ceilings and not the greatest lighting. Our home was built in the 1950's and renovations had been done over the years by previous homeowners. We didn't love the way the ceilings looked, but transitioning to smooth ceilings wasn't a project that we would have ever taken on, had we not been "forced" to. It was always something we thought would be a nice update.

I had to keep thinking of it as a blessing in disguise. The opportunity to have brand new smooth ceilings would look a million times better than what we had. It was the process of getting to the "after" and living through the messiest renovation I could have imaged, that was the challenge! 

Here are pictures of the kitchen. Our red kitchen. Spoiler alert: our kitchen isn't red anymore! I included photos of the kitchen sink, because, well, everything including the kitchen sink was effected (pun totally intended). Also notice the existing mirror back splash. That's right, mirrors decorated our kitchen under cabinet and stove area. After living with it for over 9 years, it had to go! It shouldn't have been there in the first place. 


So. The plan was to start work in November, two weeks before Thanksgiving, AND have it done in time for me to HOST Thanksgiving. In true Ohl fashion, there's nothing like an upcoming holiday and house guests to spur a major home renovation! I wish I were joking. Somehow we managed to complete the majority of the work on time! 

In part 2 I will show you the work-in-progress images and tell you how we survived. Stay tuned! 


Sunday, November 6, 2011

Laminate Landing Patch Job

The last part left to share from our stairway to heaven makeover, is how we finished the unfinished landing at the top of the stairs.

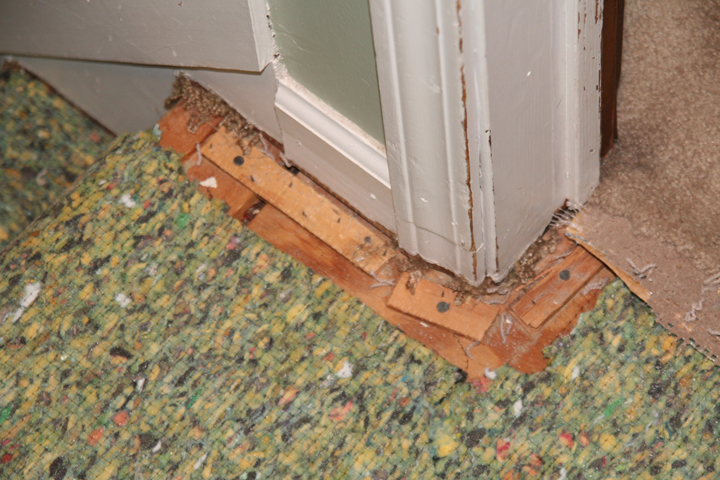
When we ripped up the carpet, our suspicions were confirmed that it was only plywood. No hardwood here. It was a bit scary looking.

There was also a significant height gap were the hardwood ledge met the plywood. 

We put our thinking caps on and looked in the garage to see what was left of the remaining laminate flooring the previous owners stashed away. There were JUST ENOUGH unused tongue and groove planks in tact. I mean just enough. That's what I call a God thing. 


The only thing we didn't have was underlayment (padding to go underneath), which comes in big rolls for $25. We only needed a 45x45 inch square. That's when we spotted a yoga mat for $8 and figured it would do the same thing, right? Add a layer of cushion and even out the transition between the gap. It worked out perfectly!


I cut the yoga mat in to pieces to fit like a puzzle, then secured it with double sided foam tape. We were pretty proud of ourselves for thinking of such a smart way to use a yoga mat :) Because, let's face it, I will probably never use a yoga mat for it's intended purpose. Ha! 


Then it was time to try our hand at installing laminate flooring for the first time. We measured, cut and clicked the planks together until they fit snugly how we wanted them. 


It looks seamless! It was quite rewarding to see this last section of our staircase come together. 


The most challenging part was installing the transition strips between the laminate and the carpet in the doorways. Those were also left over pieces found in the garage.


No more scary unfinished plywood! The laminate is a bit lighter in color than the hardwood stain, but it matches what's in the rest of the house. This was the best solution we could come up with, without having to install actual hardwood. And it only cost $8! Whoo hoo! Staircase complete. I'm so happy with it!
 

Monday, September 19, 2011

Stairway to Heaven

It's not Led Zeppelin, it's our latest home project! I am quite ecstatic to reveal our staircase "renOHLvation" if you will. Ever since we moved into our house, 4 years ago, I've thought about removing the carpet from the stairs. The risk, however, was that we didn't know if there were hardwoods underneath or what condition they were in. So the shaggy old carpet stayed. Until I couldn't look at it any longer. Andrew and I agreed that we would take the risk and start ripping it off. If the stairs were in good shape, we would re-finish and paint them. If they were in bad shape, we would have new carpet installed. 

Let's take a look at the BEFORE. The walls were sponge painted a strange grayish-bluish-white when we moved in. It was hard to look at.

So we painted it a light green, along with the dining/sitting room. A choice I now question, but when we moved in, and actually had the liberty of painting an entire house whatever color(s) we wanted, I went a little crazy. I like color. What can I say? It was a nice green, it just didn't go with the rest of the house.

Take a look at this carpet in all it's speckled-shaggy-goodness.

We took the plunge and started to rip it out! Which required the use of my husbands muscles. I have no upper body strength. It's sad. 

 Bye-bye carpet! This is what we were left with. Carpet padding + 9,000 staples.

The wood didn't look half bad! Praise the Lord! It would need to be cleaned up, stained and painted, but there weren't any major defects. Phew! I could see it all coming together...


We did discover just plywood at the top of the landing. Whomp whomp. We will need to cover this spot with laminate flooring, but that is another project for another day. 

I also discovered a little piece of history. I get a big kick out of this type of stuff. See that little peach doted patch? This wallpaper used to be in the hall. How funny. 


Now for some work... 

I ripped out so many staples with these tools, my hand hurt for 2 days. See that bucket? Full of staples! I would like to thank the carpet installers of this house's past, for being so thorough and using SO MANY STAPLES. Really. Thank you. 


Once THAT was done, we had bare steps that needed to be sanded. We used a small hand sander regular sand paper. I say "we" a lot, but Andrew did the hardest work and I helped him when it was something I could handle. Or that he trusted me with. The hand sander is the most advanced power tool I use.


Once the stairs were prepped, it was time to prime the treads white and stain the wood. We used Rustoleum Ultimate Wood Stain in light walnut. 
The second step was tested first. I loved the color immediately! It was a close match to the existing bannister and not too far from the floor color.


It turned out so beautiful!
Even better than I imagined! We painted the walls our favorite light tan, "Kilim Beige" by Sherwin Williams, which was leftover from the kitchen and upstairs bathroom. We also had enough white paint for the treads from another project. The only real investment was the wood stain, clear polyurethane and our own labor. More so my husbands labor. A labor of love to make my staircase dreams come true! 


I just love the wood grain! It makes the whole hall look so fresh and bright. 


The only thing missing is this old railing. I didn't want to put it back up. Is it really necessary? No, I don't want people falling down my stairs, but it's kind of ruins the look of the smooth clean wall. I don't miss it. We're going to leave it off for now. Andrew holds to the argument that it's a house code law that you have to have a railing. If we ever do have to put it back up, it's in the garage. 


One last look at the before and after. What a difference! I couldn't be happier! Yes, the stairs are a little more creaky. Yes, they are a tad on the slippery side, compared to carpet. But does it look waaaay better? Yes! Is it funny to watch our cats run up them and occasionally slip? Yes! No. Kidding!

I owe the biggest THANK YOU EVER to my does-it-all-handy-man-husband, Andrew. You made my vision for these stairs come to life! Thank you for the many hours, hard work and sweat you invested. You are the best painter I know! And I love you for going along with my home project schemes and helping me accomplish things like this that make me happy. I love you. And I love sharing our home and working on it together.