Sharpie mug projects have been making their rounds on Pinterest for a while and I've wanted to give it a try. I was curious to see if it's as easy as it looks. Finding inexpensive plain white mugs was half the battle! For some reason they were difficult to find - probably because I was looking for them!
The type of Sharpie is critical. I learned that OIL BASED Sharpie's work best. I found a variety of individual colors at Hobby Lobby. This tutorial was especially helpful and guided me step by step.
My cousin Nicole and her fiance Matt are getting married in October, so I thought this would be the perfect opportunity to make a Mr. and Mrs. set to add to her bridal shower gift.
I measured the area of the mug where I wanted my design to go, then I designed my type on the computer and printed it out. I cut out the paper and scribbled pencil on the backs. Then I taped the paper to the mug and traced the outlines of the type onto the mugs. Next, I drew the design right onto the mug with the Sharpie's and let it dry overnight. I baked them the next day at 425 degrees for 30 minutes - placing the mugs in the oven when it was cool, and leaving them overnight to cool completely after baking.
Aren't they cute? I would definitely like to make more of these. It was a relatively quick project and you can customize them for anyone.
I find myself saving jars. Pickle jars. Sauce jars. Pesto jars. Hot pepper jars. Glass jars of all shapes and sizes. Mason jars. I just like glass. I can't explain it. It's so easy to clean and re-purpose.
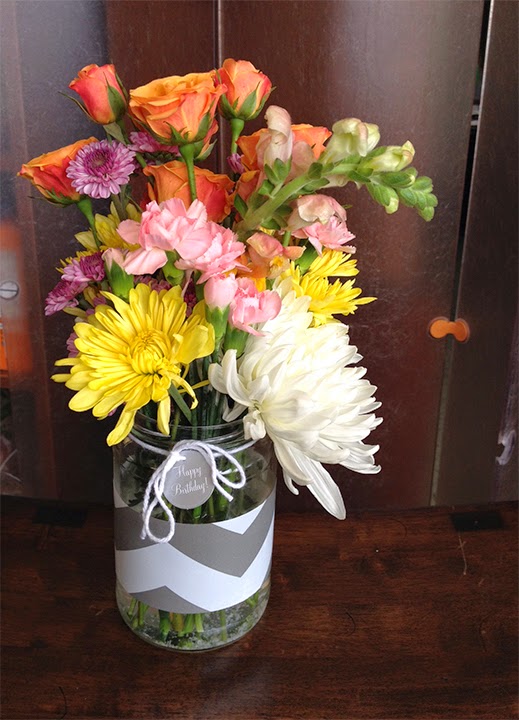
Once such use, is turning them into flower vases to gift or decorate a table. I recently made a birthday bouquet for my coworker and it was adorable. What made it special was the addition of a strip of decorative contact paper around the middle. So simple!
You can pick fresh flowers from your garden or pick up an inexpensive mixed bouquet at the grocery store.
Empty, clean and remove the label from your choice of jar.
Measure and cut a strip of adhesive backed paper. I got a 2 pack of rolls from Marshall's.
Carefully stick contact paper around the middle of the jar. Be mindful of curves which will cause wrinkles.
Cut the stems and arrange your flowers. Add some ribbon, raffia or a tag and you have a perfectly lovely flower arrangement for not a lot of money!
Even a simple string with a little message will brighten someones day.
Isn't that sweet?
Who needs a fancy vase? Save those jars! Pickle jars work especially well because they are a little larger. Jars are perfect center pieces for bridal or baby showers, or even a rustic wedding. Think twice before throwing them into the recycling bin.