Have you seen those adorable burlap bulletin boards, memo boards, shadow boxes - and anything else you can think of, covered with burlap? There's all kinds of accent pieces in stores featuring burlap fabric. I am a big fan of that stuff. But, sometimes I see something and think, "I could make that." So, I decided to actually try it.
I saw this board in TJ Maxx for around $20 and a larger one behind it for around $40. It's essentially just a board, burlap and decorative nail head trim. I knew I could DIY something similar.
On my trip to IKEA, I spotted these 22x15 inch plain wood framed cork boards for $5.99. Jackpot! I got two, because I thought a pair, side by side, would look nice in my office.
I already had a large piece of burlap fabric, leftover from another project. I picked up 3 packages of furniture nails from Lowes for $1.30 each.
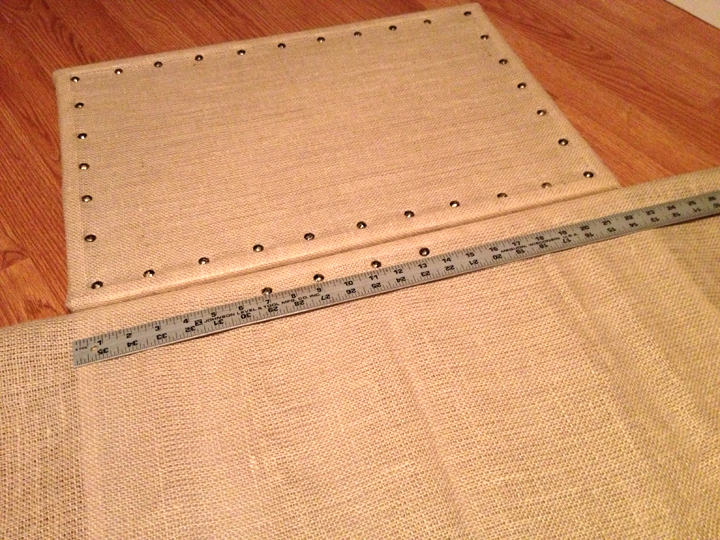
I measured and cut the burlap, large enough to wrap around each board generously.
I wrapped it up like a present, using duct tape to keep in in place, while I secured the nails to the front. I later removed the duct tape, once the nails were secure, and used a staple gun (with small staples) to keep the fabric tight and finish the back (sorry, no picture of that part). I tried my best to make neat corner edges.
While the burlap was taped down on the back, I turned the board over to add the nails. I started in the center, using the wood frame as a guide, and placed the nails about 2 inches apart. I made sure to space them evenly and adjusted as needed. I wanted both boards to look identical, so when one was done, I used it as a guide for the second board.
Having the wood frame actually made it quite easy because I lined them all up along it's edge. Once the nail head trim was in place, I removed the duct tape (or you could leave it as it) and stapled the burlap in place tightly, finishing the corners.
I really love how they turned out! Aren't they cute? You can customize any size cork board. Large nail head trim would be really fun. I've even seen burlap with different patterns, typography and prints.
I love a good before and after. A pretty easy project to turn an ordinary cork board into one with natural-chic charm.
These Burlap Message Boards from Ballard Designs (a great site) start at $29 (small), $59 (medium) and $149 (large). It cost me about $16 to make two medium size boards (plus the cost of burlap, which I already had). Talk about a bargain!
Here's a couple more inspiring burlap frames that would be super cute and easy to make. Paint the fame a fun color and swap out the glass for some padded or cork backed burlap. I may need to try this one too!
I can't wait to use them in my new office!
Supplies: Cork board Burlap fabric Nail head trim or furniture nails Duct tape Staple gun with small staples Ruler


Thank you so much for your tutorial. I can't wait to use it to make for my sister's wedding. ^.^
ReplyDeleteThank you!!! 👌👌
ReplyDelete